 English
 French
 German
 Spanish
 Polish
 Chinese
 Japanese
 Korean
 Russian
Contents
Answer Excerpt
Silicone baby bath spout covers may slip off or fit loosely when the internal cavity does not match the bathtub spout, the rear opening provides insufficient contact, or the silicone hardness and wall thickness are not suited to the reference faucet geometry. Reliable fit requires buyers to validate spout dimensions, taper, diverter position, rear clearance, internal fit ribs, installation force, and removal behavior using actual reference samples before tooling.
A silicone bath spout cover is not a universal accessory that can automatically fit every bathtub faucet. For OEM buyers, the most important step is to define the target spout geometry before finalizing the cover.
Why Is Bath Spout Cover Fit More Complicated Than It Looks?
A silicone baby bath spout cover is generally designed as a soft shell that surrounds an exposed bathtub spout. Its performance depends on the relationship between the external faucet shape and the internal geometry of the silicone cover.
A cover may look correct from the outside but still have poor retention if its internal cavity is too large, its rear opening does not match the spout profile, or its contact areas are incorrectly positioned.
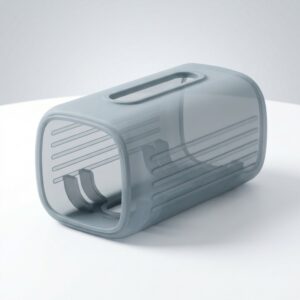
LYA Silicone’s existing custom silicone baby bath spout cover product design uses a one-piece open-back shell, a top diverter-access slot, internal flexible fit ribs, and a bottom drainage opening. These features provide a practical reference for discussing fit and installation requirements with an OEM manufacturer.
The key principle is simple: the outer appearance can be customized, but the internal fit must be developed around a defined reference spout.
1. Different Bathtub Spouts Have Different Geometries
One reason a cover fits one bathtub but slips on another is that bathtub spouts do not all share the same dimensions or shape.
Differences may include:
-
Overall spout length
-
Maximum width and height
-
Cross-sectional shape
-
Front-end curvature
-
Taper along the spout body
-
Distance between the spout and the bathroom wall
-
Water outlet position
-
Shower diverter location
-
Diverter operating travel
For example, two spouts may have similar external widths but different heights or rear profiles. A cover designed around one spout may therefore have excessive clearance when installed on the other.
Before mold development, buyers should identify the intended spout models or define a controlled compatibility range.
A dimensional record should include front, side, top, and rear views. A dimensional tolerance guide can also help buyers and manufacturers define how critical dimensions are measured and approved.
Do not assume that a single internal cavity will fit every faucet simply because the products look similar in a photograph.
2. Why Do Silicone Bath Spout Covers Slip or Rotate?
Several structural problems can contribute to poor fit retention.
The internal cavity is too large
If the internal shell is much larger than the reference spout, the cover may move around during installation or normal handling.
Excessive clearance can reduce the contact area between the silicone and the spout. This may allow the cover to rotate, slide forward, or move sideways.
The corrective action is not necessarily to make the entire cover smaller. The manufacturer should identify where the clearance occurs and adjust the internal envelope accordingly.
The rear opening does not match the spout profile
The rear opening is an important part of the installation structure.
If the opening is too wide or too tall, the shell may not maintain sufficient contact around the spout. If it is too narrow, installation may require excessive stretching and could make removal difficult.
The opening should be evaluated together with:
-
Rear opening width and height
-
Spout cross-section
-
Spout taper
-
Silicone hardness
-
Sidewall thickness
-
Installation clearance
-
Internal contact position
The goal is controlled installation and retention, not maximum compression.
The spout taper is not considered
Some spouts become narrower or change shape toward the outlet. If the internal cavity is designed using only one cross-sectional measurement, the cover may fit at one location but remain loose at another.
A better approach is to compare the spout profile at several positions along its length.
The internal shell should follow the actual reference geometry rather than relying on a single width measurement.
The silicone structure is too soft or too firm
Silicone hardness affects flexibility, installation, recovery, and contact behavior.
If the shell is too soft for its geometry, it may deform during installation and fail to maintain consistent contact.
If it is too firm, the rear opening may not conform easily to the target spout. Installation and removal may also become difficult.
Hardness should be selected together with wall thickness, internal clearance, opening dimensions, and the target spout profile.
Simply increasing hardness does not guarantee better retention.
The internal fit ribs are incorrectly positioned
Low-profile internal ribs can provide additional localized contact with the reference spout.
However, ribs only help when their position and dimensions match the actual spout geometry.
Important design variables include:
-
Rib height
-
Rib width
-
Rib length
-
Rib position
-
Contact area
-
Silicone hardness
-
Clearance between ribs and spout
Ribs placed in the wrong area may create uneven contact rather than improve fit.
3. How Should the Rear Opening and Fit Ribs Work Together?
The rear opening and internal ribs should be designed as one retention system.
The opening provides the main installation path. The internal ribs can then help establish contact at selected locations inside the shell.
For an OEM project, buyers should review three areas together.
First: the opening geometry.
The opening must allow the cover to pass over the target spout without excessive stretching. Its shape should correspond to the actual rear profile rather than a generic rectangular or circular opening.
Second: the internal contact areas.
The manufacturer should identify where the cover needs to contact the spout and where clearance is required. Ribs should be positioned according to these contact areas.
Third: the wall thickness around the opening.
A flexible opening needs enough deformation capacity for installation, but the surrounding wall must also maintain its intended shape.
Wall thickness should not be selected independently of the opening dimensions. Buyers can review the wall-thickness design guide when discussing the balance between flexibility and structural support.
A successful design should be installable without excessive force while maintaining a stable fit on the approved reference spout.
4. Does a Tighter Fit Always Mean Better Retention?
No. A very tight fit can create problems even if the cover initially appears secure.
Excessive interference may cause:
-
Difficult installation
-
Difficult removal
-
Stretching around the rear opening
-
Distortion of the sidewalls
-
Stress around the top diverter slot
-
Permanent deformation after repeated installation
A cover that is difficult to remove is not automatically a better product.
The design should balance three requirements:
-
The cover can be installed on the approved reference spout.
-
It remains sufficiently stable during normal handling.
-
It can be removed for cleaning and inspection without unnecessary deformation.
The buyer and manufacturer should agree on an acceptable installation and removal method before sample approval.
5. The Diverter Slot Must Match the Faucet
Many bathtub spouts have a shower diverter on the upper surface.
If the cover includes a top access slot, the slot must match the actual diverter position and operating movement.
A poorly positioned slot may:
-
Press against the diverter
-
Restrict finger access
-
Interfere with the diverter’s travel
-
Create excessive stretching around the opening
-
Distort the top of the cover
The slot should be designed using the target spout’s diverter dimensions, position, height, and required operating clearance.
The manufacturer should test the diverter while the cover is installed, not only inspect the slot visually.
The water outlet must also remain unobstructed. Buyers should confirm the final cover position and outlet clearance using the actual reference spout.
6. What Should Be Tested Before Approving the Sample?
A product photograph or CAD rendering cannot confirm actual fit retention.
A practical sample-validation process should include the following steps.
Step 1: Confirm the reference spout.
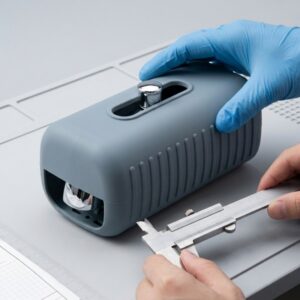
Use a physical spout sample, approved dimensional fixture, drawing, or sufficiently detailed reference data.
Step 2: Check installation.
Install the cover using the intended method. Observe whether the opening stretches evenly and whether the shell reaches its intended position.
Step 3: Check fit and movement.
Inspect whether the cover moves forward, rotates, or shifts sideways under normal handling.
Step 4: Check the diverter.
Operate the diverter through its intended travel while the cover is installed. Confirm that the slot does not interfere with operation.
Step 5: Check removal and recovery.
Remove and reinstall the cover repeatedly using a defined method. Inspect the rear opening, internal ribs, and sidewalls for visible distortion or damage.
Step 6: Check drainage.
After water exposure, inspect whether water can leave through the intended drainage opening and open rear cavity. The product should also be evaluated in its normal drying orientation. For further design considerations, refer to the drainage and easy-clean design guide.
Step 7: Confirm the approved reference sample.
Record the approved dimensions, appearance, fit condition, diverter clearance, and inspection criteria. Use the approved sample as the reference for production.
7. What Information Should Buyers Provide Before OEM Development?
A manufacturer cannot accurately evaluate fit using only a product name or a front-view photograph.
For a custom silicone bath spout cover project, buyers should prepare:
| Information | What to provide |
|---|---|
| Reference spout | Physical sample, drawing, or clear photographs |
| Dimensions | Length, width, height, taper, and outlet profile |
| Rear clearance | Distance between the spout and wall |
| Diverter | Position, dimensions, and operating travel |
| Cover design | Overall length, width, height, and preferred shape |
| Internal fit | Required clearance and contact areas |
| Material | Silicone material requirements and target-market needs |
| Hardness | Preferred flexibility or reference sample |
| Drainage | Required drainage position and cleaning method |
| Branding | Pantone color, logo, and surface finish |
| Packaging | Retail box, installation card, barcode, or gift-set packaging |
| Quantity | Estimated order quantity and target market |
If the buyer wants one design to fit several faucet models, provide the dimensions and samples of every intended model.
The manufacturer can then evaluate whether one design can reasonably cover the specified range or whether different sizes or internal structures are needed.
Fit-Validation Checklist Before Mass Production
Before approving the final sample, buyers should confirm:
A bath spout cover is an accessory, not a substitute for adult supervision or normal bath-time safety practices. Product claims and instructions should reflect the final validated design and the target market.
Frequently Asked Questions
Does one silicone bath spout cover fit every bathtub faucet?
No. Bathtub spouts can differ in length, width, height, taper, outlet geometry, diverter position, and wall clearance. Buyers should define the target spout or compatibility range before tooling.
Can internal silicone ribs improve fit retention?
They can provide additional contact at selected locations, but their dimensions and positions must be developed around the reference spout. Poorly positioned ribs may create uneven contact.
Should the silicone be made harder to stop the cover from slipping?
Not automatically. Hardness must be evaluated with wall thickness, opening geometry, internal clearance, and installation force. A harder shell may become more difficult to install or remove.
Can the top diverter slot be customized?
Yes. Its position and dimensions can be developed according to the approved spout’s diverter location, size, and required operating travel.
Can one mold fit several bathtub spout models?
It depends on the dimensional and geometric differences between the models. Buyers should provide the intended reference samples or drawings so the manufacturer can evaluate whether one internal cavity is suitable or multiple sizes are required.
What should be approved before mass production?
Buyers should approve the reference spout, internal fit, rear opening, fit ribs, wall thickness, hardness, diverter clearance, drainage, installation and removal behavior, appearance, packaging, and final reference sample.
How LYA Silicone Supports Custom Bath Spout Cover Projects
LYA Silicone supports custom silicone product development for baby care brands, wholesalers, distributors, importers, retailers, and private-label buyers.
For bath spout cover projects, development can include:
-
Reference spout and drawing evaluation
-
Internal cavity and rear-opening review
-
Fit-rib and wall-thickness discussion
-
Silicone hardness selection according to project requirements
-
Diverter-access and drainage review
-
Custom mold development when required
-
Sample production and fit evaluation
-
Pantone color and logo customization
-
Inspection and packaging coordination
-
OEM/ODM bulk production
Our OEM/ODM silicone manufacturing service supports product development from structure review and tooling to sampling, inspection, packaging, and production.
Brands developing a wider Silicone Baby Products collection can also coordinate colors, packaging, and related bath accessories.
If you are developing a custom silicone bath spout cover, send your reference spout, dimensions, photos, diverter details, target cover size, material requirements, color, logo, packaging, target market, and estimated quantity. You can contact LYA Silicone to discuss your OEM or ODM project.